Evaluating Participants
Once the evaluation is set to Active status, evaluators can begin rating participants. This section covers how to use the evaluation form as an evaluator.
Accessing the Evaluation
There are several ways to start evaluating:
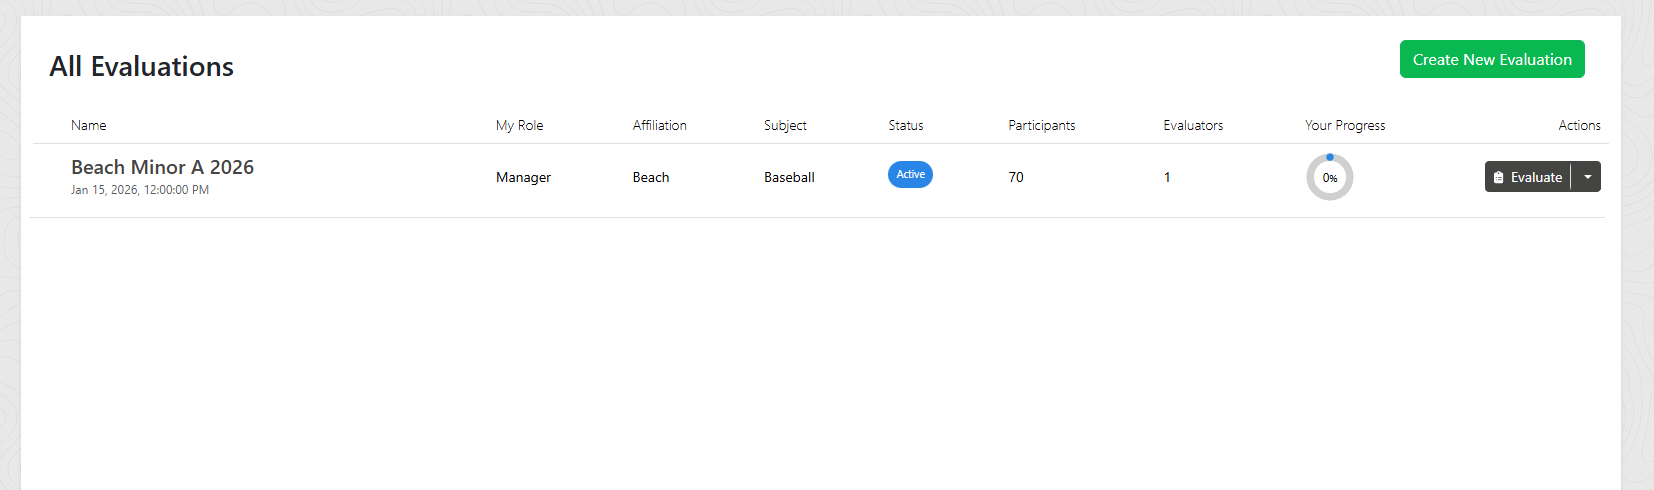
- From Your Dashboard: If you created the evaluation or were invited, it will appear in your evaluations list. Click the Evaluate button to begin.
- Via Invitation Link: If you received an email invitation, click the link to accept and access the evaluation.
- Via Public Link: If the manager shared a public link, visiting it will prompt you to sign in (or create an account) and automatically grant you evaluator access.
The Evaluation Screen
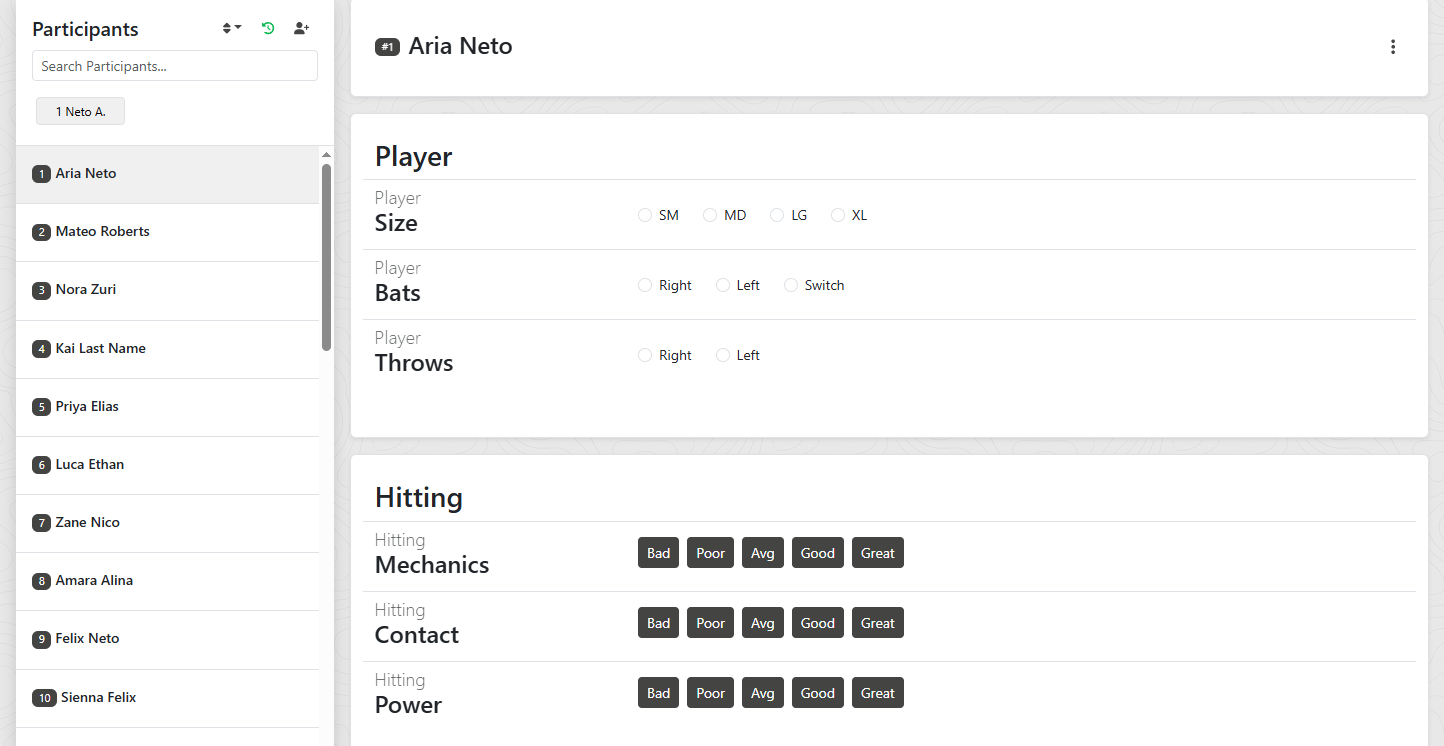
The evaluation interface is designed for quick, efficient rating of participants:
Participant List
On desktop, the participant list appears as a sidebar on the left. On mobile, tap the menu icon to open the participant drawer. Use the search box to quickly find participants by name or bib number.
Participant Header
Shows the selected participant's name, bib number (if assigned), age, and any permanent tags. The three-dot menu provides additional options like editing participant details (managers only).
Evaluation Form
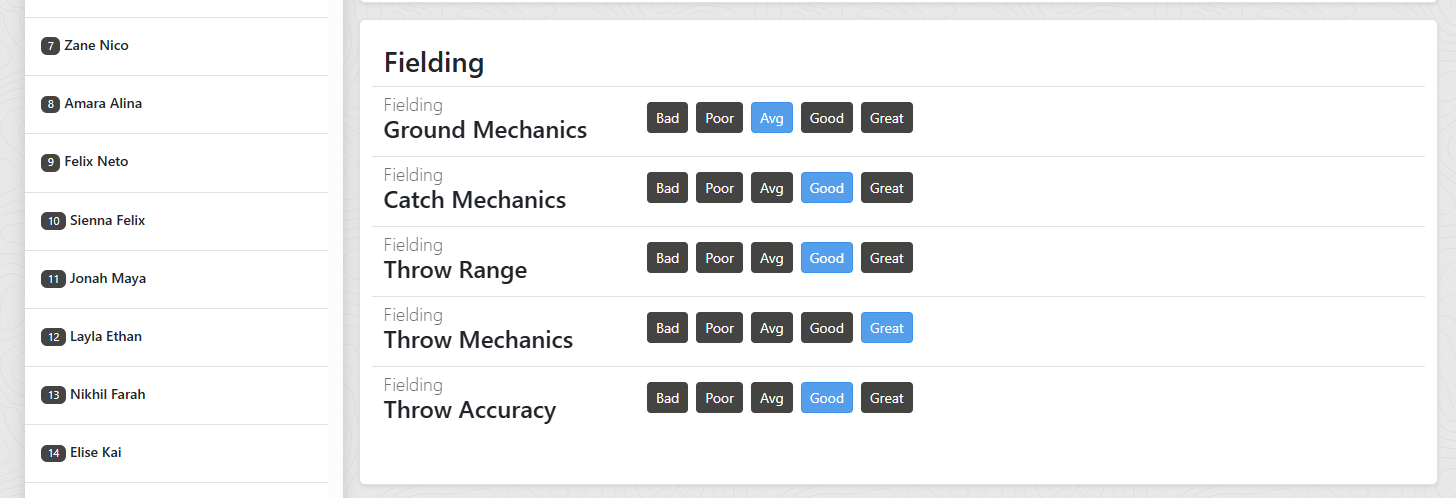
Categories are displayed as cards. Each category contains its attributes with the appropriate input controls (buttons, sliders, checkboxes, etc.) based on how the form was configured.
How to Evaluate a Participant
- Select a Participant: Click on a participant from the list (desktop) or tap the menu icon and select from the drawer (mobile). The form will load with any existing ratings you've already entered.
- Rate Each Attribute: Work through each category and provide ratings:
- Rating Buttons: Click once to select a rating. Click the same button again to deselect.
- Numeric Inputs: Enter a number directly or use the slider if available.
- Checkboxes: Check all options that apply.
- Text Fields: Type notes or comments as needed.
- Auto-Save: All changes are saved automatically. You'll see a brief save indicator confirming your entry was recorded. There's no submit button, so you can just rate and move on!
- Modify a Participant: The evaluation manager can modify a participant during an evaluation by clicking the three dots on the right hand side of the participant name header. Other evaluators will be notified live if a Participant has been updated.
- Add a Participant: The evaluation manager can add a participant during an evaluation by clicking the Add Participant icon in the participants list. Other evaluators will be notified live if a new walk-on participant has been added.
- Move to Next Participant: Select another participant from the list to continue evaluating. Your previous ratings are saved automatically.
Group Recent Participants
For convenience, the system tracks and shows your recently evaluated participants at the top of the participants list. This can be helpful when participants are grouped together for an evaluation and you need to quickly switch between one participant in the group and the other.
Real-Time Updates
The evaluation system uses live synchronization. If the evaluation manager adds new participants or updates participant information while you're evaluating, you'll see the changes reflected automatically with a notification.
Tips for Efficient Evaluating
- Bring a Printout Backup: Print your forms beforehand in case you have trouble connecting to the app.
- Use Bib Numbers: If participants have bib numbers assigned, you can search by number for quick selection.
- Work Category by Category: Some evaluators prefer to rate all participants on one category before moving to the next.
- Use Tags for Notes: Instead of lengthy text notes, consider using evaluation tags for quick categorization.
- Mobile-Friendly: The evaluation form can be used with tablets and phones for on-field evaluations, although a keyboard is preferred. If you are using a mobile phone it's best practice to write notes on the PDF print out and enter them into the system later.