How to Create and Manage an Evaluation
Step 1: Evaluation Details
The first step in creating a new evaluation is setting up the core details. This information helps identify the event and ensures your data is organized correctly for future reporting.
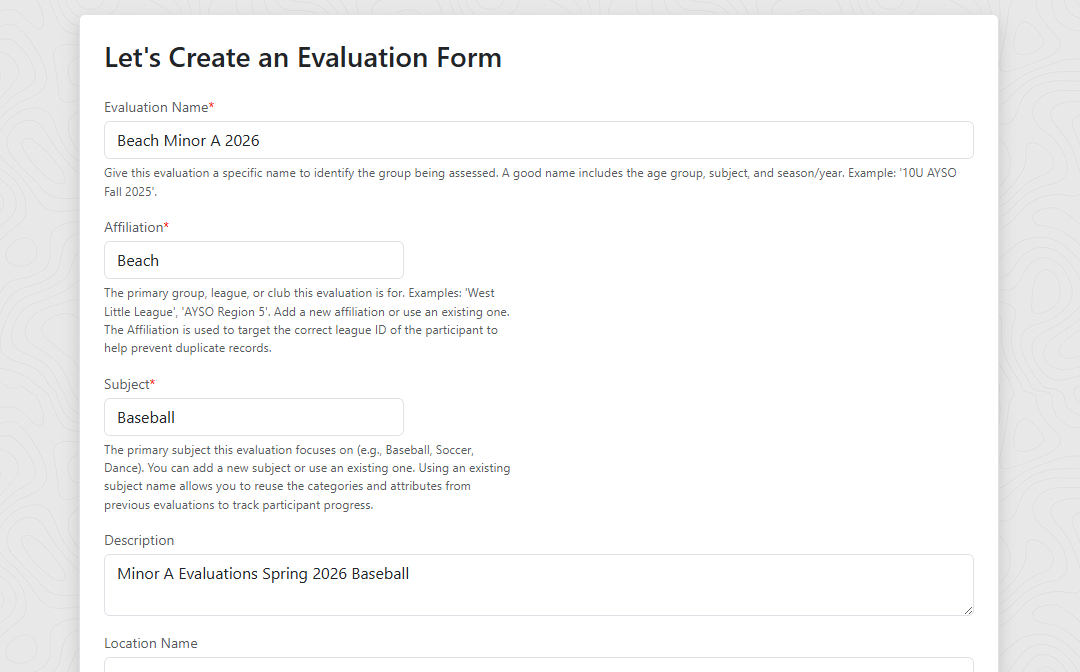
- Evaluation Name: Give your evaluation a specific name that is easy to identify later (e.g., "10U AYSO Fall 2024").
- Affiliation: Type the league name, group or club this evaluation belongs to (e.g., "West Little League", “AYSO”). Pro Tip: The Affiliation helps the system target the correct League IDs (when provided) for participants when importing, helping prevent duplicate records. You might have a participant that is part of multiple affiliations for different sports and with the correct affiliations you can see all of their information in one spot.
- Subject: Type the primary sport or activity (e.g., "Soccer", "Dance", "Baseball"). Pro Tip: Using an existing Subject allows you to reuse categories and attributes from previous evaluations. This allows you to see how a participant performs over time or multiple evaluations.
- Location & Schedule: Enter the location details (Name, Address) and the Start/End dates. Pro Tip: The "Start Date" and "End Date" do not determine or automatically change when participants are allowed to be evaluated. The evaluation status locks or allows evaluations. Why? When sharing evaluations some evaluators might already know what ratings they will put for specific players beforehand. When an evaluation is set to ‘Active’, evaluators are allowed to submit evaluations.
Step 2: Participants
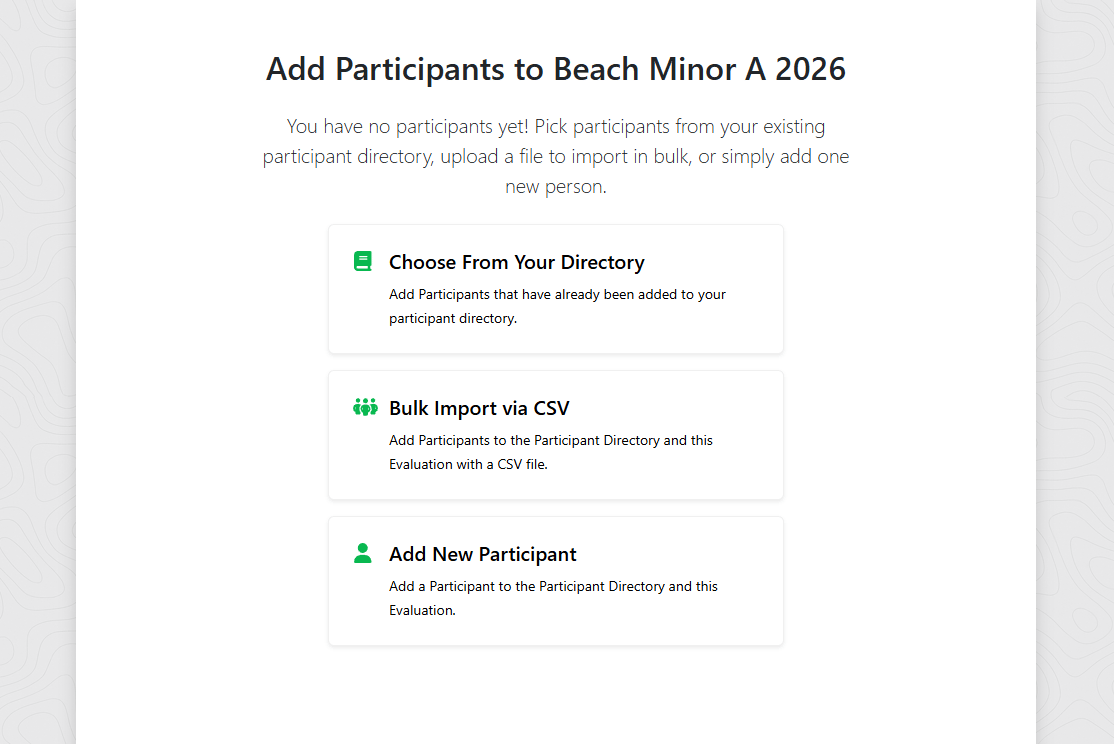
You have three ways to add participants to your evaluation:
- Choose From Directory: If you have evaluated participants before, they are already in your Participant Directory. Search for them by name in the directory list. Click a participant to move them into the current evaluation.
- Add New Participant: Manually add a single person by entering their details (Name, Date of Birth, Affiliation/League ID).
- Bulk Import via CSV: This is the fastest way to add a large roster.
How to Import Participants via CSV
- Upload: The importer only supports importing .csv spreadsheet files. Drag and drop or select your .csv file into the uploader.
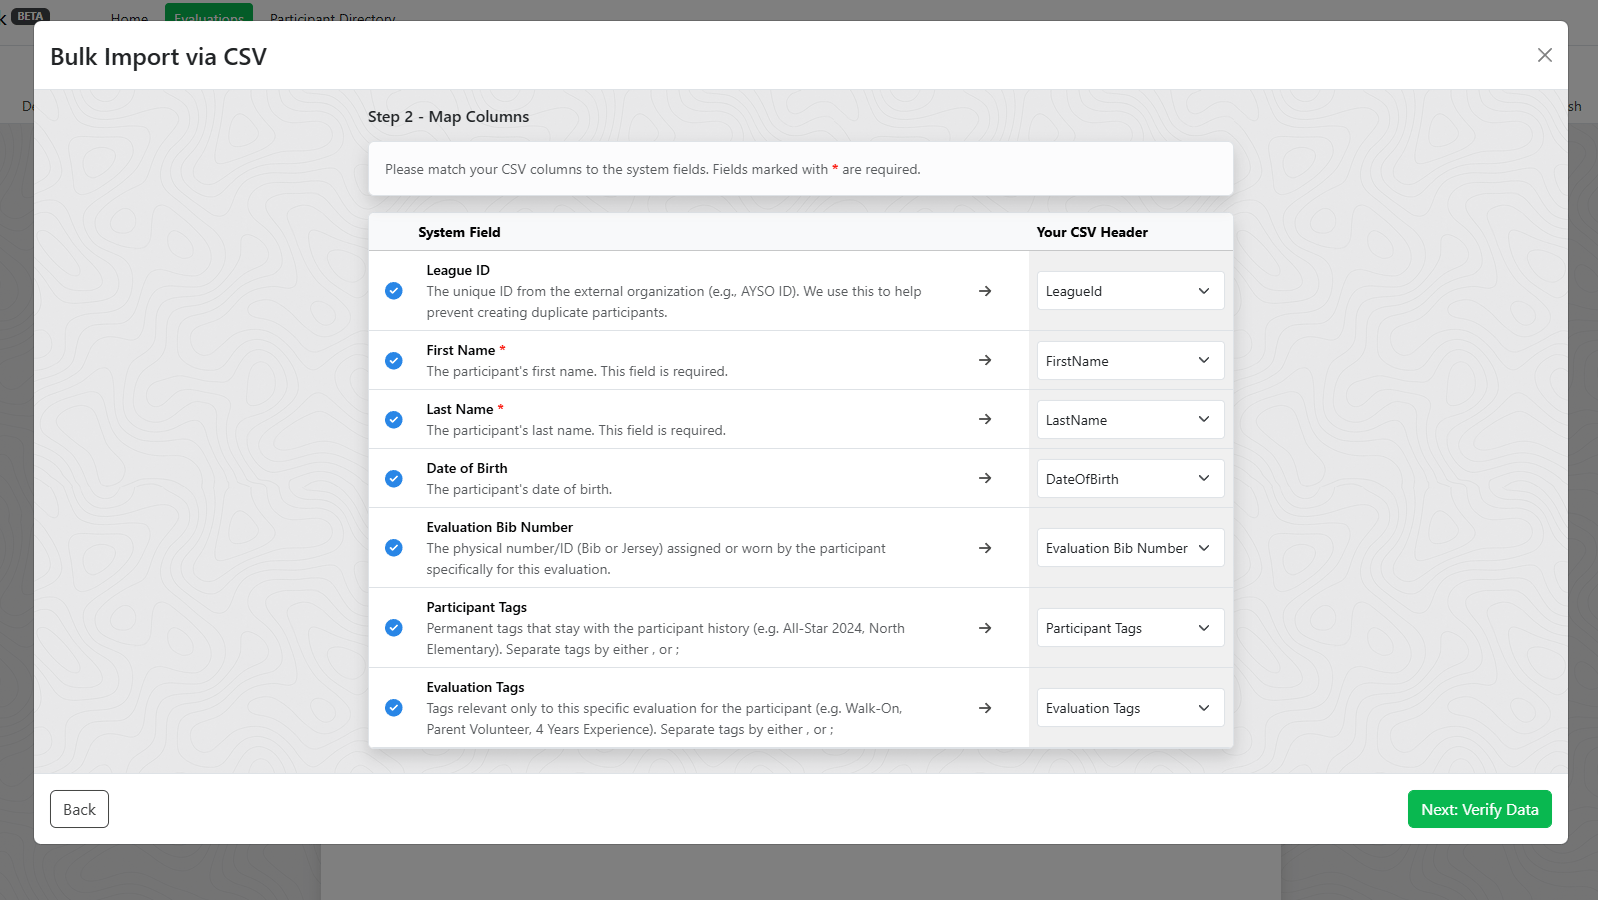
- Map Columns: The system will try to automatically match your headers. Ensure the following are available to be mapped:
- First Name & Last Name (Required)
- League ID (Recommended: helps prevent duplicates)
- Evaluation Bib Number (The number the player is wearing for the evaluation)
- Tags: Tags are informational bits that can be used to help you choose between participants during your draft. Tags should be separated by a , or ; to be properly parsed by the system. You can add Tag columns for:
- Permanent Tags: These are tags that stay with the participant throughout their evaluation history. (e.g., 2025 All Star, Left Footed, Schools Attended)
- Evaluation Tags: These are tags that are specific to the participant at the time of the evaluation. (e.g., Walk-On, Team Parent, 3 Years Experience, 5th Grade)
- Review & Process: The system will compare your file against existing participant directory records.
- Matches: If a match is found (by League ID or Name and DOB), you can choose to use the existing participant record and import any new tags given to the participant.
- New: If no match is found, you can import them as a new participant and add them to the evaluation.
- Errors: Any invalid records will be flagged for you to fix.
Step 3: Form Builder
This is where you define what you are evaluating and how you want to evaluate it. You can start from scratch, use a template, or copy a form from a previous evaluation.

Categories
Think of a Category as a bucket or organizer for related skills (e.g., "Hitting", "Pitching", "Defense") for the Subject you are evaluating.
- Add Category: Create a new Category or select from a list of categories used in previous evaluations for the selected Subject.
- Order: Drag and drop categories with the drag handle icon to determine the order they appear on the evaluator's screen.
Attributes
Attributes are the specific skills within a category (e.g., inside "Hitting", you might have “Mechanics”, "Power", "Contact").
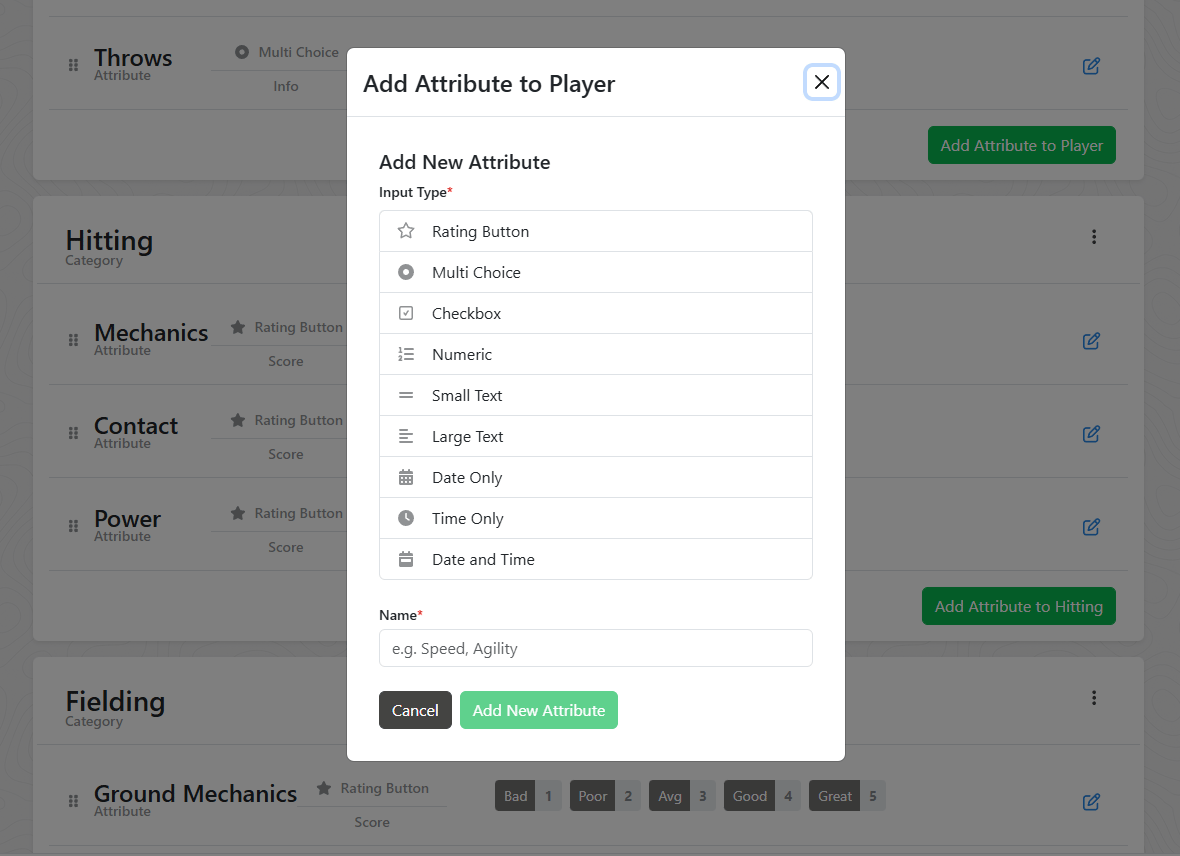
Input Types
Choose how the evaluator will interact with the form:
- Rating Button Group: One-click buttons for common ratings or observations (e.g., '5', 'Good', 'Needs Improvement'). Default rating buttons are labeled with descriptive names and scored 1 through 5 but can be changed to reflect your scoring needs. You may edit the name displayed to the evaluator and the value.
- Numeric Input: Can be used to enter a rating value (e.g. 1 through 5) or for measuring specific stats (e.g., "Exit Velocity" or "40 Yard Dash"). You can enforce Min/Max limits and use a slider for easier mobile use.
- Checkboxes: Select multiple ratings or observations about a participant during the evaluation. For example, checking off specific steps you want to see completed during an evaluation or positions they have experience at.
- Text Box: For comments or notes.
Value Types
This setting changes how the results of the evaluations are shown and reported:
- Score: The numeric value counts toward the participant's overall rank/score.
- Measurement: Numerical data (like speed or height) used for sorting/filtering but not calculated into the total ranking score (not yet at least).
- Info: Descriptive data for reference only.
Step 4: Publish & Share
Once your form is built and participants are added, you are ready to invite evaluators unless the evaluation is just for yourself.
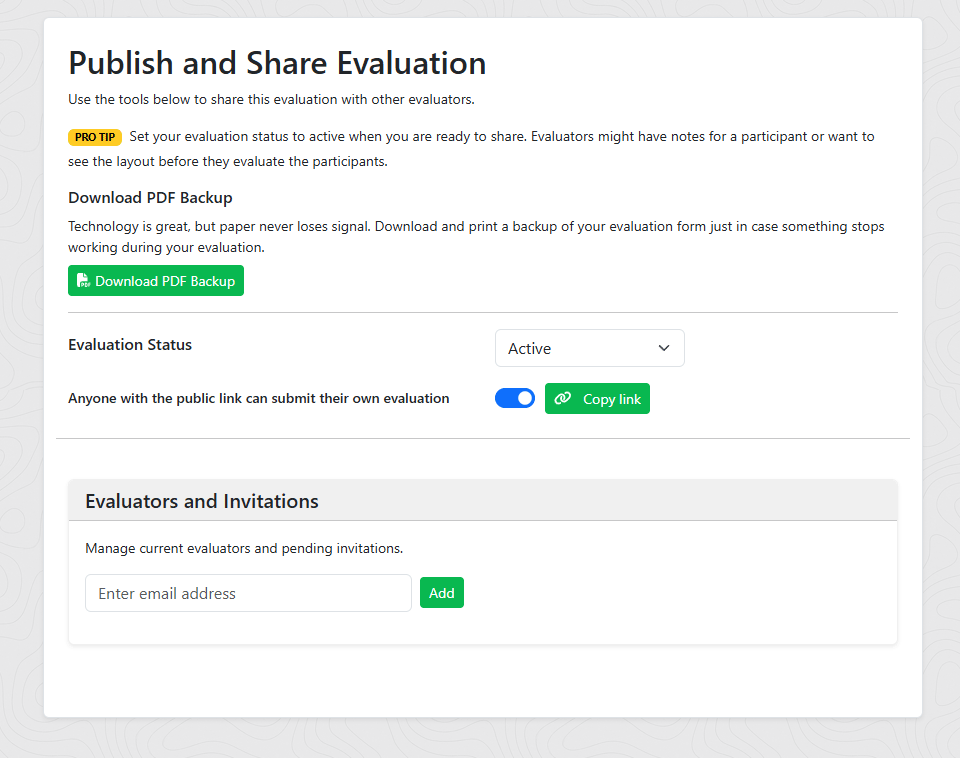
- Enable Link: Toggle this on to generate a unique URL for your evaluation.
- Copy Link: Any user with this link can create an account (or sign in) and immediately have access to use your evaluation form to evaluate the participants.
Invite Users: Enter email addresses to have the system send direct invitations.
Manage Access:
- Resend: If a user hasn't accepted yet, you can resend the invite email.
- Revoke: Remove a user's access. If they joined via a public link, you may need to disable the public link to prevent them from re-joining.
You can download a formatted PDF of your evaluation form to use as a paper backup. This is useful for offline environments or evaluators who prefer taking notes by hand.
Evaluating Participants
Once the evaluation is set to Active status, evaluators can begin rating participants. This section covers how to use the evaluation form as an evaluator.
Accessing the Evaluation
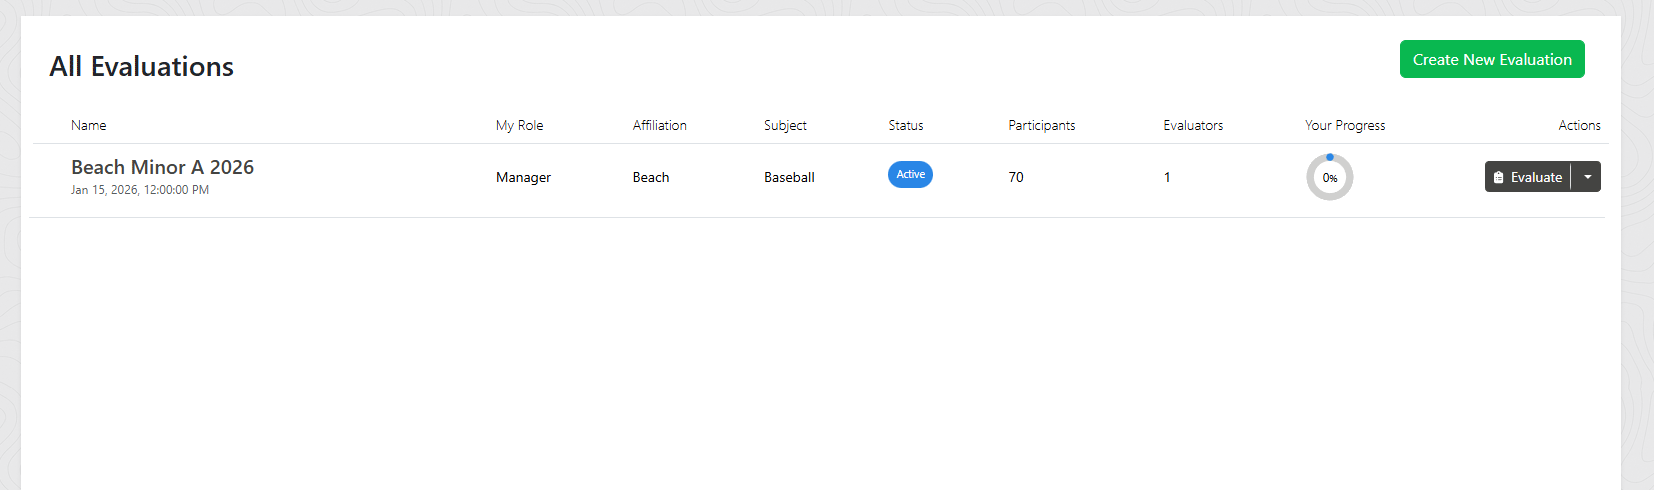
There are several ways to start evaluating:
- From Your Dashboard: If you created the evaluation or were invited, it will appear in your evaluations list. Click the Evaluate button to begin.
- Via Invitation Link: If you received an email invitation, click the link to accept and access the evaluation.
- Via Public Link: If the manager shared a public link, visiting it will prompt you to sign in (or create an account) and automatically grant you evaluator access.
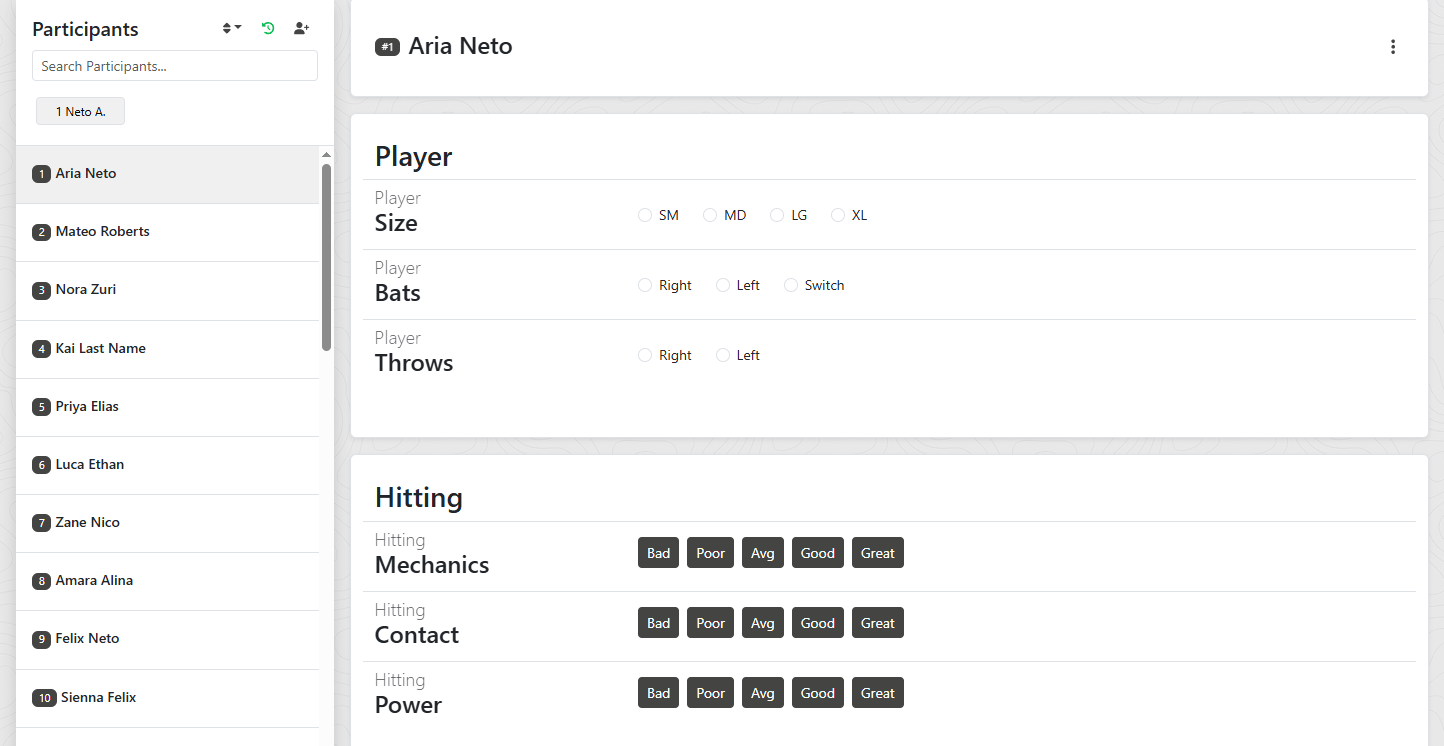
The Evaluation Screen
The evaluation interface is designed for quick, efficient rating of participants:
Participant List
On desktop, the participant list appears as a sidebar on the left. On mobile, tap the menu icon to open the participant drawer. Use the search box to quickly find participants by name or bib number.
Participant Header
Shows the selected participant's name, bib number (if assigned), age, and any permanent tags. The three-dot menu provides additional options like editing participant details (managers only).
Evaluation Form
Categories are displayed as cards. Each category contains its attributes with the appropriate input controls (buttons, sliders, checkboxes, etc.) based on how the form was configured.
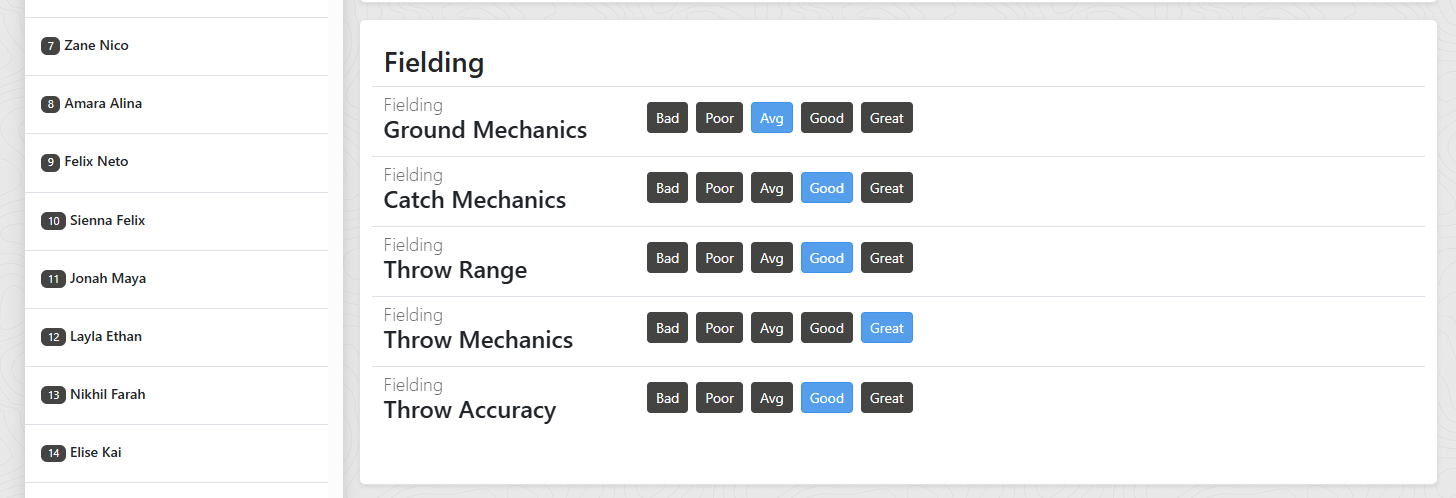
How to Evaluate a Participant
- Select a Participant: Click on a participant from the list (desktop) or tap the menu icon and select from the drawer (mobile). The form will load with any existing ratings you've already entered.
- Rate Each Attribute: Work through each category and provide ratings:
- Rating Buttons: Click once to select a rating. Click the same button again to deselect.
- Numeric Inputs: Enter a number directly or use the slider if available.
- Checkboxes: Check all options that apply.
- Text Fields: Type notes or comments as needed.
- Auto-Save: All changes are saved automatically. You'll see a brief save indicator confirming your entry was recorded. There's no submit button, so you can just rate and move on!
- Modify a Participant: The evaluation manager can modify a participant during an evaluation by clicking the three dots on the right hand side of the participant name header. Other evaluators will be notified live if a Participant has been updated.
- Add a Participant: The evaluation manager can add a participant during an evaluation by clicking the Add Participant icon in the participants list. Other evaluators will be notified live if a new walk-on participant has been added.
- Move to Next Participant: Select another participant from the list to continue evaluating. Your previous ratings are saved automatically.
Group Recent Participants
For convenience, the system tracks and shows your recently evaluated participants at the top of the participants list. This can be helpful when participants are grouped together for an evaluation and you need to quickly switch between one participant in the group and the other.
Real-Time Updates
The evaluation system uses live synchronization. If the evaluation manager adds new participants or updates participant information while you're evaluating, you'll see the changes reflected automatically with a notification.
Tips for Efficient Evaluating
- Bring a Printout Backup: Print your forms beforehand in case you have trouble connecting to the app.
- Use Bib Numbers: If participants have bib numbers assigned, you can search by number for quick selection.
- Work Category by Category: Some evaluators prefer to rate all participants on one category before moving to the next.
- Use Tags for Notes: Instead of lengthy text notes, consider using evaluation tags for quick categorization.
- Mobile-Friendly: The evaluation form can be used with tablets and phones for on-field evaluations, although a keyboard is preferred. If you are using a mobile phone it's best practice to write notes on the PDF print out and enter them into the system later.